Hot Cross Buns

I love making hot cross buns on Good Friday and delivering a basket full to good friends. I wanted to share two great recipes for you to try this year. They are super easy and absolutely delicious warmed up with some honey butter. You won’t regret the work that goes into these little bundles of raisiny goodness.

This recipe comes from foodnessgracious.com and it has been my favorite recipe to date. Be sure to click the link below so you can check out the great site as well as get the complete recipe. I used 8 packets of yeast which equals approximately 2 ounces but the recipe says to use seven. Your choice there but I also love the yeasty taste in bread. This recipe adds some spice which is the more traditional way to go. They are perfect.

Traditional Spiced Easter Hot Cross Buns

Sweet and spicy hot cross buns

Hot Cross Buns

Prep Time 4 hours
Cook Time 25 minutes
Servings 12

Ingredients

  • 4 cups bread flour
  • 2 gram x 7 envelopes of dried yeast
  • 1/4 cup sugar
  • 1 1/2 teaspoons cinnamon
  • 1/4 teaspoon nutmeg
  • 1 teaspoon ground cloves
  • Pinch of salt
  • 1 cup raisins
  • 1 cup sultanas
  • 4 Tablespoons butter
  • 1 1/4 cups milk
  • 2 eggs beaten

For the cross

  • 1/2 cup flour
  • 6 Tablespoons water
  • Mix the flour and water together to form a thick smooth paste.

For the glaze

  • 1/3 cup water
  • 2 Tablespoons sugar

Instructions

For the buns

  1. Preheat the oven to 385 degrees F. Butter a 13 x 9 inch cookie tray and set aside.
  2. In a large bowl mix the flour, yeast, sugar, spices, salt, raisins and sultanas together. In a small pan melt the butter and add the milk to it. Heat until lukewarm and pour into the flour mixture.
  3. Add the beaten eggs on top and mix until the dough forms a ball, coming away from the sides of the bowl. Lightly grease the bowl with olive oil and set aside.
  4. Dump the dough onto a flour dusted work top and work it into a nice round ball. Place back into the large bowl, cover with plastic wrap and let sit for about 1 1/2 hours and doubled in size.
  5. Once the dough has risen, dump it back out onto the table. Knock all of the air out of it and divide it into 12 equal parts. Roll each piece of dough into a ball and place on the buttered baking sheet, seam side down until you have a 4 x 3 formation.
  6. Cover loosely with plastic and let rest for about another two hours until well risen and the balls are butting up against each other.

For the cross

  1. Once the buns are ready for the oven make the flour cross mixture.
  2. Add it to a small zip lock bag and snip the corner from it. Use this to pipe the long lines from one end of the buns to the other. Turn it around and line the buns again creating the cross shape.
  3. Place them in the oven and bake for about 25 minutes or until golden brown on top.

For the glaze

  1. As they are baking make the syrup glaze. Bring to a boil in a small pan and simmer for about two minutes. Once they come out of the oven, glaze liberally at once with the syrup and let cool for 10 minutes.
  2. Serve warm with butter.

Not everyone loves traditional recipes. You don’t have to miss out on the cross bun love! Try these Chocolate Chip Hot Cross Buns fro The Girl Creative- full of chocolate goodness and an absolutely delicious change to the traditional bun recipe.

Chocolate Chip Hot Cross Buns

ENJOY!


My Top Five Breakfasts

I was menu planning for this upcoming week and I got way too excited about breakfasts. First, it is my favorite meal to cook. I love the array of food choices, the challenge of quick breakfasts, the ingredients and the way a good breakfast can boost my mood for the day. I.Love. Breakfast.

I’m sharing recipes I have found and tried over the past few years. The main object of each is one of my top five faves but the recipes are indeed not mine. I like changing things up. If I want to make an omelet I like finding different recipes for them. I never get bored with a meal that I change-up regularly. Here’s to keeping breakfast interesting!

Coffee cakes are delicious. I love adding a fruit to mine- blueberries, apples, cherries…I like to change it up. This Blueberry Coffee Cake recipe come from mybakingaddiction.com.

It is just sweet enough- almost muffin like and I like to cook it the night before so breakfast is early enough and easy to serve. I’ve made a few cakes that didn’t have the blueberry count right but this was spot on for my taste. Make it this week. You won’t regret it. Blueberry Coffee Cake

Image result for blueberry coffee cake

Ingredients:

FOR THE STREUSEL:

  • 3/4 cup all-purpose flour or gluten-free flour*
  • 1/4 cup granulated sugar
  • 2 tablespoons brown sugar
  • pinch of salt
  • 1/4 cup unsalted butter, cold

FOR THE CAKE BATTER:

  • 2 1/4 cups all-purpose flour or gluten-free flour*
  • 2 1/4 teaspoons baking powder
  • 3/4 teaspoon salt
  • 3/4 cup canola oil (or another neutral-tasting vegetable oil)
  • 1 cup + 2 tablespoons granulated sugar
  • 3 tablespoons lemon juice
  • 1 tablespoon lemon zest
  • 1 1/4 teaspoons lemon extract
  • 1/2 teaspoon vanilla extract
  • 3 large eggs, room temperature
  • 2 cups fresh blueberries, rinsed and patted dry

Use 2 1/4 cups (320 grams) of this mixture for the cake batter and the remaining 3/4 cup (107 grams) in the streusel. I highly recommend weighing the flours rather than using measuring cups to ensure accuracy!

Directions:

  1. Preheat the oven to 340°F and line an 8″x 8″ pan with parchment paper.
  2. Prepare the streusel. In a medium mixing bowl, stir together the flour, granulated sugar, brown sugar, and salt. Add in the butter using your hands and mix together until coarse crumbs form. Place the bowl in the refrigerator while preparing the cake batter
  3. In a medium mixing bowl, stir together the flour, baking powder, and salt. Set aside.
  4. In a large mixing bowl, stir together the oil, sugar, lemon juice, lemon zest, lemon extract, vanilla extract and eggs. Once well combined, gently fold in the flour mixture. Do not over mix. Carefully fold in the blueberries.
  5. Pour into the prepared pan and sprinkle the streusel evenly over the top.
  6. Bake for 45-50 minutes or until a toothpick inserted in the center of the cake comes out clean. A few moist crumbs are okay but there shouldn’t be wet batter on the toothpick.
  7. Let cool for 15 minutes and then serve. Cover and store leftovers at room temperature for up to 3 days.

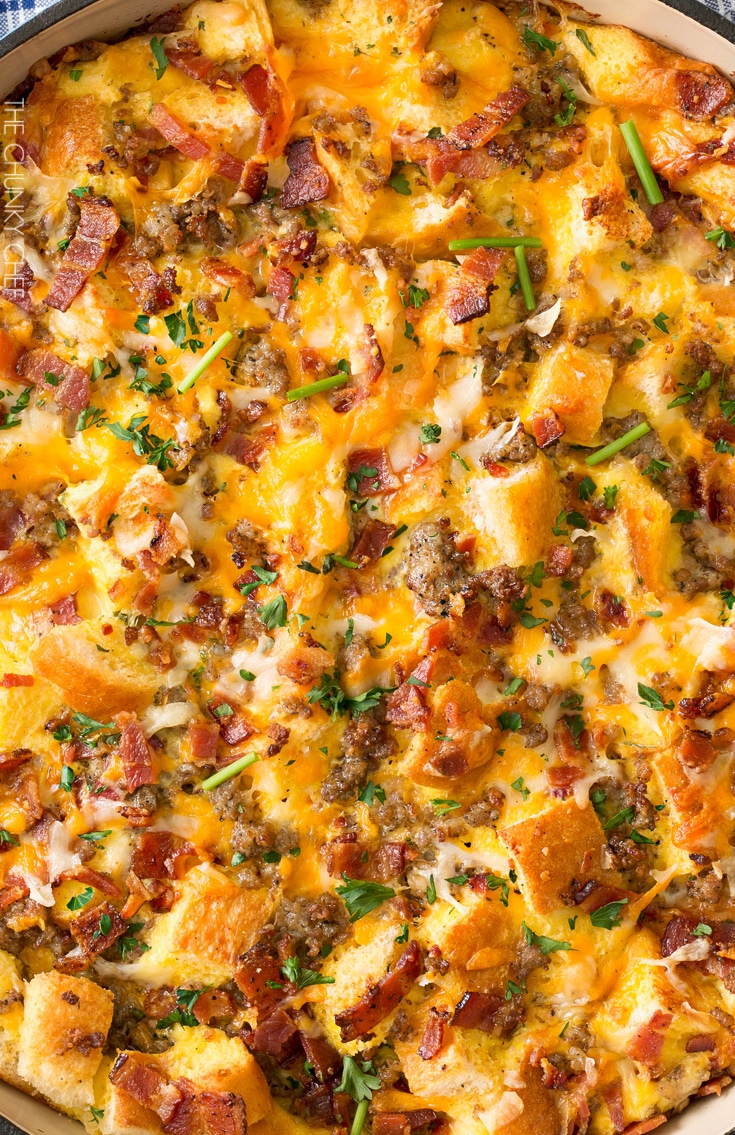
Next on my list of faves is breakfast strata. Here is another time when there are SO many options. I like this overnight strata from thechunkychef.com. I love breakfast sausage and the mix of cheeses (YUM GRUYERE!!)

Overnight Breakfast Strata | This breakfast strata dish is made the night before, refrigerated overnight, then baked to bubbly, cheesy perfection! | http://thechunkychef.com

Ingredients

  • 1 lb sage or breakfast sausage
  • 8-10 pieces bacon, cooked and crumbled
  • 8 large eggs
  • 2 2/3 cups whole milk
  • 1 1/2 tsp kosher salt
  • 1 1/2 tsp ground dry mustard
  • 1 tsp dried parsley
  • 1/4 tsp black pepper
  • 1/4 tsp paprika
  • 3/4 loaf Italian bread, cubed into 1/2″ pieces
  • 1 cup shredded cheddar cheese
  • 1/2 cup shredded Gruyere cheese
  • minced fresh parsley, for garnish
  • chopped fresh chives, for garnish
  • dollop sour cream, for garnish

Instructions

  1. In a large skillet, brown and crumble sausage until cooked.  Drain and set aside.

  2. Use a bread knife to cube Italian bread into 1/2″ pieces, then set aside.  Combine shredded cheddar and Gruyere cheeses, then set aside.

  3. To a large mixing bowl, add eggs, milk, salt, dry mustard, dried parsley, black pepper and paprika.  Whisk until combined.

  4. Add cubed bread pieces to bottom of 3 quart oven safe pot, or 9×13″ baking pan.  Top with crumbled sausage, bacon, and 3/4 of the cheeses.  Pour egg custard over the top, using a wooden spoon to gently push any un-soaked bread down into the custard.  Sprinkle with remaining shredded cheeses.

  5. Cover pan with foil and refrigerate overnight.

  6. Remove from refrigerator, uncover, and let sit at room temperature while oven preheats to 350 degrees F.  Bake, uncovered, for 40-45 minutes, until a toothpick inserted into the center comes out clean.

  7. Serve hot, topped with garnishes if desired.

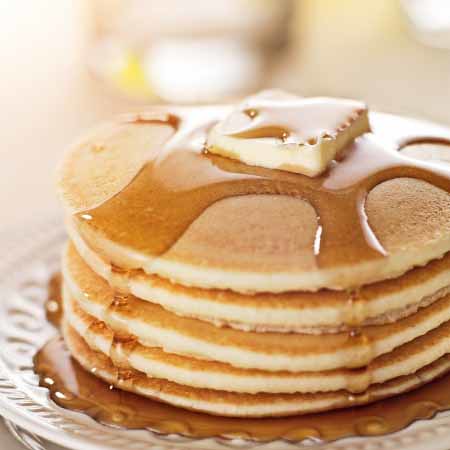
Here is my number three- Buttermilk Pancakes. Now, I have no idea where I got this recipe from. I have used it for years. The key to fluffy pancakes with FLAVOR is buttermilk. Another tip to try is only grease/butter your skillet if you can trust the nonstick surface to do its job. The texture and appearance of the pancake will do better without it. If you must use butter, use just enough to avoid sticking. Be sure to warm your syrup as well. Trust me, it matters.

Buttermilk Pancakes

Image result for buttermilk pancakes images

Ingredients
  • 2 cups all-purpose flour
  • 2 tsp baking powder
  • 1 tsp baking soda
  • ½ tsp salt
  • 2 tbsp granulated sugar
  • 2 cups buttermilk
  • 2 large eggs, lightly beaten
Instructions
  1. Whisk together the dry ingredients in a large bowl or, as I frequently do, a large glass measuring cup.
  2. Whisk in the buttermilk and eggs just until combined. Some small lumps are okay.
  3. Let pancake batter rest for 10 minutes.
  4. Heat a large skillet or griddle over medium-high heat.
  5. Spray with non-stick cooking spray OR brush with butter or oil.
  6. Ladle ⅓ – ½ cup batter onto the griddle for each pancake.
  7. Flip the pancakes over when small bubbles appear on the surface and continue cooking on the opposite side until golden brown.
  8. Serve with butter and syrup.

Since you have some syrup in the fridge for those pancakes lets save some for my number four favorite breakfast- french toast. Now my pancake love is simple- basic buttermilk pancakes are delicious. French toast screams for cinnamon though and this recipe doesn’t disappoint. Bread is the main ingredient and the type of bread makes a difference. I usually go for Challah bread. Check your bakery and local grocery store for this delicious fluffy bread. Be sure to soak the bread well in the egg mixture otherwise the center of the cooked toast is just plain dry bread.

Challah French Toast

Ingredients

  • 1 loaf challah bread, sliced into 1 inch thick slices *
  • 6 large eggs
  • 1 1/2 cups milk
  • 1 tbsp. maple syrup
  • 1/2 tsp vanilla
  • 1/2 tsp salt
  • 1/2 tsp cinnamon
  • butter & oil

Instructions

  1. Heat a heaping teaspoon of butter and one of oil in a skillet over medium low heat.
  2. Meanwhile, in a large bowl, whisk together the eggs, milk, syrup, vanilla and salt. I then worked in batches to cook it up.
  3. Dip a piece in the egg/milk mixture, flip once then transfer to the heated pan, adding more until the pan is full. This depends on the size of pan you use. I like to move the pieces around a bit in the beginning to make sure there is no stickage. Flip after 2-3 minutes and cook on the other side for another 2-3 minutes. Continue with the remaining pieces, adding more butter and oil if needed.
  4. Serve warm with maple syrup and fresh berries.

Finally for my fifth favorite breakfast is Quiche. Once again, this is a breakfast with a lot of options. You can go all veggies, or throw in a great meat like ham or pork and the cheese options are up to you. I like this one from The Pioneer Woman. It is filling and wonderfully pretty. It tastes great too 😉 If you don’t have the baking pan this recipe calls for a pie pan works fine.

  • 3/4 pounds Thick Cut, Peppered Bacon
  • 1 stick Butter
  • 1 whole Large (or 2 Medium) Onions, Very Thinly Sliced
  • 2 boxes (5 Oz. Each) White Mushrooms, Washed And Sliced
  • 1 can (14 Oz.) Quartered Artichoke Hearts
  • 1 whole Pie Crust, Or Half A Recipe Of “Sylvia’s Perfect Pie Crust”
  • 7 whole Eggs
  • 1-1/2 cup Heavy Cream
  • 2 cups Grated Swiss Cheese
  • Salt And Pepper, to taste
  • Fresh Parsley, Fresh Chives (optional)

INSTRUCTIONS

Preheat oven to 400 degrees.

In a skillet, fry bacon until crisp. Crumble and set aside. Pour out excess grease but don’t clean the pan.

Melt butter in the same skillet. Add onions and cook for a few minutes. Add mushrooms and artichokes and cook for a few more minutes. Salt mixture to taste. Remove from heat and allow to cool for about 20 minutes.

Roll out pie crust and press into deep dish tart pan. (May also use 2 standard pie crusts for this recipe.) In a large bowl, beat eggs with cream. Add grated cheese, salt and pepper, and set aside. (Add cayenne pepper if you’d like a little kick.)

With a slotted spoon, add mushroom mixture into egg/cream mixture. Stir together. Add bacon and stir. Add parsley or chives, if desired.

Pour into pie crust and press to submerge ingredients. Cover loosely with foil, place on a baking sheet, and bake at 400 degrees for 1 hour. Bake for slightly longer if quiche is overly jiggly.

Remove from oven and allow to set for ten minutes before serving. Remove quiche from pan and slice into wedges.

Those are my favorites. The ability to play with flavors and ingredients will always keep me coming back for more breakfast recipes. Enjoy!


MUFFINS…Sweet and Savory

Muffins are one of my favorite things to bake. I love that I can make a muffin that can be the meal or the perfect addition to our meals. Sweet or savory…muffins are easy, fast and delicious. I’m sharing a few of my favorite finds below. All have been tried and tested and LOVED in my home. Let me know how they go with YOUR family.

Blueberry muffins are a classic. You can always improve a classic though as so far these Blueberry Streusel Muffins are an amazing upgrade. Bursting with fresh berries, they are just sweet enough for a great breakfast. These were a great find from Layersofhappiness.com. Serve with your favorite hot morning beverage!

Blueberry Streusel Muffins

blueberry-muffins-2

Ingredients:

For the blueberry swirl:

  • 1 cup fresh blueberries (about 1 pint)
  • 1 teaspoon sugar

For the muffins:

  • 2 1/2 cups all-purpose flour
  • 1 1/8 cups sugar
  • 2 1/2 teaspoon baking powder
  • 1 teaspoon salt
  • 2 large eggs
  • 4 Tablespoons unsalted butter, melted & cooled slightly
  • 1/4 cup vegetable oil
  • 1 cup milk
  • 1 1/2 teaspoon vanilla

For the streusel topping:

  • 1/2 cup all-purpose flour
  • 1/3 cup granulated sugar
  • 1/2 stick salted butter-melted
  • 1/2 teaspoon cinnamon

Directions:

Preheat oven to 425 degrees. Spray a standard muffin tin with vegetable oil spray (or line with paper liners and spray).

For the blueberry swirl:

![i]**If you want to use whole blueberries in your muffin batter instead of a blueberry swirl, omit this step, toss whole blueberries with 1 additional Tablespoon of flour, and fold blueberries in after preparing batter.[/i]

Bring blueberries and 1 teaspoon of the sugar to a simmer in a small saucepan over medium heat. Cook, mashing the berries with a spoon several times and stirring frequently, until the berries have broken down and the mixture is thickened about 6 minutes. Transfer to a small bowl and cool to room temperature, 10-15 minutes.

For the muffins:

Whisk the flour, baking powder and salt together in a large bowl. Set aside.

In a medium bowl, whisk together 1-1/8 cups sugar and eggs until thick and well combined, about 45 seconds. Slowly whisk in the butter and oil until combined. Nest, whisk in the milk and vanilla until combined.

Using a rubber spatula, fold the egg mixture into the flour mixture until just moistened. The batter will be very lumpy with a few spots of dry flour; do not overmix. (If using whole blueberries, fold in now.)

Fill muffin cups 1/2 full with batter and top with a teaspoon or so of the cooked berry mixture. Use a toothpick to swirl. Divide the remaining batter between muffin cups. The batter should completely fill the cups and mound slightly. Divide the remaining cooked berry mixture between muffin cups. Use a toothpick to swirl.

Make the streusel topping:

To make the crumb topping in a small bowl, whisk together flour, sugar and cinnamon, add melted butter and stir with a fork until crumbly. Spoon streusel over muffins.

Bake until the muffin tops are golden and just firm, 17-18 minutes, rotating the muffin tin halfway through. Cool the muffins in the muffin tin for 5 minutes, then remove to a wire rack and cool 5 more minutes before serving. Yield: 12 muffins.

Muffins need not be fruit packed and sweet. There are so many wonderful savory options and these Cheese and garlic Muffins are perfect along side a bowl of Minestrone or a cheesy pasta dish…and even a glass of red wine. This comes from recipetineats.com.

Cheese and Garlic Muffins

Cheese & Garlic Muffins | My friends all said these taste just like cheesy garlic bread!

INGREDIENTS
Dry Ingredients
  • 2 cups plain flour (250g)
  • 1½ tsp baking powder
  • ½ tsp baking soda / bi-carb soda (Note 1)
  • ½ tsp salt
Wet Ingredients
  • 1 egg, lightly whisked
  • ¾ cups + 2 tbsp milk (220ml)
  • 1 tsp white vinegar (or lemon juice)
  • 3 tbsp sour cream (or plain yoghurt)
  • 4 tbsp vegetable oil (or any plain oils, not olive oil)
  • ¼ cup finely chopped fresh parsley (or 2 tbsp dried)
  • 1 garlic clove, crushed
  • 2 cups grated cheddar cheese (~175g – 200g) (Note 1)
Stuffing
  • 3oz/90g salted butter (about ⅘ of a stick)
  • 2 garlic cloves, crushed
  • 12 slices of mozzarella or Monterey Jack cheese, 3cm/2.5″ squares (~3mm / ⅛” thick) (Note 1)
 
INSTRUCTIONS
  1. Preheat oven to 380 F.
  2. Spray a 12 hole standard muffin tin.
  3. Place butter and garlic in a microwave proof bowl and melt in 30 second bursts. Keep warm (just leave in microwave).
  4. Sift together Dry Ingredients in a bowl. Make a well in the centre, add Wet Ingredients except grated cheese. Mix until just combined (it should be a lumpy thick batter), then stir through cheese.
  5. Dollop a heaped tablespoon (or about ½ ice cream scooper which is what I use) into each hole. Top with a slice of cheese and drizzle each with 1 tsp garlic butter. Divide remaining batter between muffins (about ¾ ice cream scoop / 2 level tablespoons), then drizzle over remaining garlic butter (about ½ tsp each).
  6. Bake for 20 – 25 minutes or until the muffins are golden on top and spring back when touched in the centre. (Note 2)
  7. Best served warm so the cheese in the middle is gooey! But also divine at room temperature.
 
NOTES
1. I typically use grated Cheddar, tasty or Monterey Jack cheese to mix through the batter, then Mozzarella or Monterey Jack slices for the gooey filling. Monterey Jack stretches and oozes very nicely like Mozzarella.

2. This muffin has more ingredients than really basic ones, calling for both baking powder & baking soda, plus the sour ingredients (lemon + sour cream) to activate the baking soda. The reason is because the cheese and butter makes this muffin a bit denser than ordinary muffins, so I use baking soda for extra lift (because baking soda is 2-3 times stronger than baking powder).

You can substitute the baking soda with 2 tsp of baking powder but the muffin won’t be quite as light and fluffy – but it will still rise, don’t worry!

3. The skewer test might be misleading for these muffins because of the gooey cheese inside. So use the touch-spring back test. 

4. These stay fresh for 2 days in an airtight container. But if you reheat them, they are good for 3 – 4 days (because warming them up makes them super moist again!). These can also be frozen for 2 – 3 months.

How about a dessert muffin? Try these Pumpkin Cheesecake Muffins. Sweet, decadent and delicious, they make a perfect dessert to a lighter meal, especially in the Fall. This recipe comes from Sally’s Baking Addiction. 
Pumpkin muffins filled with cream cheese filling and topped with sweet cinnamon brown sugar streusel!

Ingredients:

Crumb Topping

  • 1/4 cup (50g) packed light or dark brown sugar
  • 1/2 cup (62g) all-purpose flour
  • 1 teaspoon ground cinnamon
  • 1/4 cup (60g) unsalted butter, melted

Pumpkin Muffins

  • 1 and 3/4 cups (220g) all-purpose flour
  • 1 teaspoon baking powder
  • 1 teaspoon baking soda
  • 1/2 teaspoon salt
  • 1 and 1/2 teaspoons ground cinnamon
  • 1 teaspoon pumpkin pie spice1
  • 2/3 cup (133g) packed light or dark brown sugar
  • 2 large eggs
  • 1 cup (227g) pumpkin puree
  • 1/2 cup (120ml) vegetable oil (or canola, or melted coconut oil)
  • 1/3 cup (80ml) milk
  • 1 teaspoon vanilla extract

Cheesecake Filling

    • 6 ounces (168g) cream cheese, softened to room temperature
    • 1 egg yolk
    • 1 teaspoon vanilla extract
    • 3 Tablespoons (36g) granulated sugar

Directions:

Preheat oven to 425°F (218°C). Line two muffin sheets with 14 liners or spray with non-stick spray. Set aside.

  1. Make the crumb-topping first: Add the brown sugar, flour, and cinnamon to a small bowl and mix until combined. Add the melted butter and mix until crumbs form. Set aside.
  2. Make the pumpkin muffins: In a large bowl, toss the flour, baking powder, baking soda, salt, cinnamon and pumpkin pie spice together until combined. Set aside. In a medium bowl, whisk the brown sugar and eggs together until combined. Whisk in the pumpkin, oil, milk, and vanilla. Pour the wet ingredients into the dry ingredients and stir until just combined. Do NOT overmix the batter.
  3. Make the cheesecake filling: In a medium bowl, beat the cream cheese with an electric handheld (or stand) mixer on medium-high speed until creamy. Add the egg yolk, vanilla extract, and sugar. Beat until combined.
  4. Spoon 1 Tablespoon of pumpkin muffin batter into the muffin cups. Layer with about 1 spoonful (not quite a full Tablespoon) of cheesecake filling, then another Tablespoon of muffin batter (or however much batter is needed to fill the cups all the way to the top). Yes, you will fill the muffin cups to the very top. Some cheesecake filling may poke out of the top or on the sides. Sprinkle each muffin evenly with crumb topping and press the topping down into the muffin so it sticks.
  5. Bake for 5 minutes 425°F (218°C) then, keeping the muffins in the oven, reduce heat to 350°F (177°C)3 and continue baking for another 15-16 minutes. The total time these muffins should be in the oven is around 20-21 minutes. Allow the muffins to cool for 10 minutes in the muffin sheet, then transfer to a wire rack to cool until ready to eat. Muffins taste best on the same day, though they may be stored covered tightly at room temperature for 3 days or in the refrigerator for 5 days.
  6. Make ahead tip: For longer storage, freeze muffins for up to 3 months. Allow to thaw overnight in the refrigerator and heat up in the microwave if desired.

Recipe Notes:

  1. Instead of the pumpkin pie spice, you can use 1/4 teaspoon ground cloves, 1/2 teaspoon ground allspice, and 1/4 teaspoon ground nutmeg.

So whip put those muffin tins and start baking!

Casseroles- The Dinner Savior

Casseroles come in two categories intentional and “Oh Crap, what can I make with THIS?”The casseroles I am going to share with you fall in the first category but I am a MASTER of the “Oh Crap!” casserole as well. All to often I am throwing together some edible concoction of pantry staples and refrigerator loners. The family always enjoys them because, well, in our house you eat what your given. Still, casseroles have an out dated rap and they deserve a comeback at least the intentional casseroles deserve a come back.

I searched the web over the past few months and tried about twenty different recipes – 22 to be exact. I chose six of my family’s favorites to share and they are all wonderful. Since casseroles tend to have all the ingredients you need for a complete meal, side dishes aren’t really necessary. I like to make a big tossed salad with a dressing that coincides with the type of dish I am serving as the main course. (If you need some dressing inspiration, check out this post Salad Dressings)

The ultimate favorite at our table was the hearty Meatball and Spinach Baked Ziti. Everyone loved it and there were no leftovers. Served with a tossed salad with a traditional vinaigrette it was the perfect Sunday meal. This, as well as most of the other casseroles we loved, came from the Country Living website.

Meatball & Spinach Baked Ziti


Next up is the Tortilla Casserole also from Country Living. Because corn was out of season I subbed two cups of frozen corn and I also used only 1 jalapeno…I diced some on the side for the spicy taste-buds of myself and mt husband. This was filling and flavorful. I made a chopped salad to go along side this main course with green lettuce, diced tomatoes, corn, avocado and a lime juice vinaigrette. YUM!

tortilla casserole

Tortilla Casserole

This next casserole is a bit heavier but absolutely DELICIOUS. This Potato and Manchego Casserole with bacon is EVERYTHING a casserole should be and more. If you want to lighten it up try a Swiss cheese instead and use some turkey bacon or sausage for a little different taste. It is perfection as is. If you can’t find Manchego cheese substitute Romano.

potato and manchego casserole with maple baconPotato and Manchego Casserole

We tried out this Teriyaki Chicken Casserole because I am a fan of Teriyaki chicken and it did not disappoint. As the article states, this is a comfort food. Full of sweetness and rice it will fill you up and leave you satisfied! We threw in two small bags of mixed frozen mixed veggies and it was just enough. We chose a bag with carrots, peas and corn. A bag of cut green beans or snap peas would have been delicious as well.

Teriyaki Chicken Casserole! Have your favorite Chinese takeout prepared in a different way: baked in a casserole dish with assorted veggies and fried rice. | HomemadeHooplah.com

Teriyaki Chicken Casserole

Time for some seafood because…well, because shrimp that’s why! I LOVE SHRIMP. I love spicy shrimp, buttery shrimp, garlicky shrimp….I’m sort of a Bubba Gump of shrimp. This casserole made me happy and everyone wiped it out. The biscuits…oh, the biscuits. Make this casserole this week. Don’t wait. Go. Click the link, run to the shops and then make this casserole. You’re welcome.

Shrimp Chowder with Herb Biscuits

Now, casseroles aren’t all dinner all the time. I’ve had some good ones but this one is the PERFECT Sunday morning dish. We had our after Sunday Mass and we weren’t sorry we had to fast. It was worth the wait. It is satisfying but lightened up a bit with low fat ingredients and half of the eggs or egg whites only. If you aren’t afraid of fat and cholesterol go full in if you’d like. The tomatoes add the perfect sweet/tart bite to the dish.

breakfast casserole with turkey Sausage, mushrooms, and tomatoes

Breakfast Casserole

Pick and choose the recipes you think you’ll family will enjoy and chow down! I pick them all!

Roasted Chicken

Roasting a whole chicken is by far one of my favorite things to cook. For starters, it is incredibly simple. Secondly, my home smells wonderful all evening. Lastly, it is delicious and serves beautifully. Like making your own chicken broth? Well, the leftovers are the perfect base!

Below you will find roasted chicken three ways: a citrus chicken with a bite from garlic from Giada, a beautiful herb roasted chicken recipe and lastly a BBQ rub chicken!

Both lemon and orange juices make this chicken juicy and flavorful. One of my families favorites, I serve it along side fresh garlic green beans and a seasoned rice. Giada is my go to for healthy (not always Italian) family meals.

Garlic and Citrus Chicken

roastchick2

Herb roasted chicken is a classic because of its simplistic perfection. This recipe from epicurious.com is just that. Fresh herbs, lots of butter and a little wine make this a wonderfully seasoned chicken. Serve with buttery mashed potatoes and a great green vegetable like roasted brussel sprouts or asparagus.

Roasted Chicken with Herb Butter, Onions and Garlic

herbchick

Finally, a tasty twist on the classic roasted chicken. BBQ spice rubbed chicken is a warm spicy change to the traditional roast. The smells and flavors will make this a favorite for sure! Serve with sweet potatoes roasted or mashed and your favorite cole-slaw!

This particular recipe is from Foodnetwork.com by Sunny Anderson.

BBQ Rub Roasted Chicken

dinners-2504601_month_17018

Family Friendly Drinks

Summer is the perfect time to make some special drinks to enjoy with your family. Mixed drinks for grownups are always fun at a get together or dinner BUT making something for the whole family to enjoy is just as good! So here are three that we have tried and loved.

Peaches are fresh, in season and tasty this time of year. Some grab a few from the grocer or the farmer’s market and mix this tea up today! This recipe comes from the site aroundmyfamilytable.com.

Sweet Peach Iced Tea

Sip on this Sweet Peach Iced Tea this summer while you lounge by the pool. You'll have no regrets plus it's packed with tons of peaches with a hint of sweetness.

  • tea, brewed and chilled
  • 2 ripe peaches
  • SPLENDA® Zero™ No Calorie Liquid Sweetener
  • ice
  • 2 sprigs mint


Cut peaches in half and remove pit. Place in food processor or blender and blend until peaches are pureed, but a few small chunks remain.

Grab 2 12oz mason jars and put a large spoonful of peach puree in the bottom of each glass. Then fill with ice and add another large spoonful of peach puree. Pour chilled tea over the ice and add a gentle squeeze of SPLENDA® Zero™ No Calorie Liquid Sweetener. If it’s not sweet enough, add another gentle squeeze. Go easy as it’s really sweet and you won’t need much.

Add a straw, a sprig of mint, and enjoy.

     Save a few of those mint sprigs for this next refreshing drink! A little lavender and this sweet pineapple concoction is complete! This gem comes from the folks at delish.com. This site is an AMAZING culinary resource. Check it out.

Floral-scented herbs, such as lavender and lemon verbena, add subtle depth to fruit ades and iced tea.

INGREDIENTS

  • 1 large fresh pineapple
  • 1¼ c. sugar
  • 11 sprig fresh lavender, rosemary, or lemon verbena
  • ¼ c. fresh lemon juice

DIRECTIONS

  1. Cut the peel from the pineapple, remove the core, and cut the fruit into 1-inch pieces.
  2. Place the fruit in a food processor fitted with a metal blade and pulse until the pineapple is crushed but not pureed. Transfer to a large nonreactive pot, add the sugar, 4 cups water, and 3 herb sprigs.
  3. Bring to a simmer over medium-high heat. Reduce heat to medium-low and cook for 15 minutes. Strain the mixture through a fine mesh sieve.
  4. Gently press the solids to extract the juice. Cool and stir in the lemon juice. Serve over ice garnished with the remaining herb sprigs.


Finally there is this beautiful treat – Pink Lemonade Punch. I have seen this on a number of blogs and sites BUT since the commonly used image gives credit to Love bakes Good Cakes, I’m sticking with that as my source!

This Pink Lemonade Punch {aka Princess Punch} is great for birthday parties, princess parties, baby showers, girls' night or anytime a sweet and refreshing drink is called for! AD

Pink Lemonade Punch {aka Princess Punch}

by Jamie @ Love Bakes Good Cakes

Prep Time: 5 minutes
Cook Time: 0 minutes
Yield: 8-10 servings
Ingredients 
  • 1 can (12 oz.) frozen pink lemonade concentrate, thawed
  • 5 cups white cranberry juice cocktail
  • 5 cups lemon-lime soda, chilled
  • Fresh mint sprigs, for garnish (optional)
Instructions
In a large pitcher, stir together pink lemonade concentrate and cranberry juice cocktail. Cover and chill. Just before serving, stir in lemon-lime soda. Garnish with fresh mint, if desired.


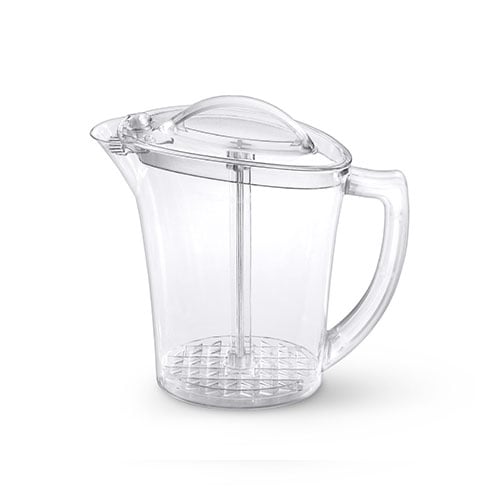
So grab your favorite mixing pitcher and stir up something delicious today! Looking for a good one, grab the QUick Stir Pitch from Pampered Chef right here! https://www.pamperedchef.com/pws/lorrainezecchini/shop/Outdoor/Outdoor+Entertaining/Quick-Stir+Pitcher/2278

Chicken Free Tacos

Yesterday I posted three amazing chicken taco recipes that I have tried and loved. Today I am sharing a few different recipes for tacos- no chicken included! It is a phenomenal mix of cuisines, styles, fillings and flavors. Let me know which ones interest you!

***Please note: I often share recipes of my own creation or tweaking. Still, much of what I share I find and test from other sites, blogs, cookbooks and friends! I ALWAYS name the sources and, since many are ones that I frequent, fully encourage you to visit and explore those sources***

Curtis Stone- the man is delicious on so many levels. I’m going to focus on the food skill level today 😉 He offers up a recipe for Korean Steak Tacos that are out of the world…or at least the other side of the world! Full of flavor, juicy steak and the perfect shell make this a perfect dinner. Side it with some homemade guacamole and a fresh slaw and you will be in taco heaven!

Here is the recipe as well as the Epicurious link where I found it last year.

Curtis Stone’s Korean Steak Tacos

Ingredients

  1. Steak
    • 1/2 cup finely chopped fresh cilantro
    • 1/4 cup packed dark brown sugar
    • 3 tablespoons canola oil
    • 3 tablespoons soy sauce
    • 1 tablespoon toasted sesame oil
    • 2 large garlic cloves, minced
    • 1 jalapeño pepper, seeded and finely chopped
    • 1 teaspoon freshly ground black pepper
    • 1 teaspoon ground coriander
    • One 2-pound flank steak (about 1 1/2 inches thick), fat trimmed
  2. Tacos
    • 1/2 head napa cabbage, halved lengthwise and shredded crosswise (about 3 cups)
    • 1 large carrot, cut into 2-inch-long matchstick-size strips
    • 8 scallions (white and green parts), thinly sliced on a sharp diagonal
    • 1/2 cup lightly packed fresh cilantro sprigs
    • Twelve 6-inch corn tortillas
    • Guacamole for Lindsay

Preparation

    1. 1. To marinate the steak: In a large baking dish, whisk the cilantro, brown sugar, canola oil, soy sauce, sesame oil, garlic, jalapeños, black pepper, and coriander to blend well. Reserve 1/4 cup of the mixture in a small bowl for serving. Place the steak in the remaining marinade and turn to coat. Marinate for at least 20 minutes at room temperature, or cover and refrigerate for up to 1 day, turning occasionally. Cover and refrigerate the reserved marinade.
    2. 2. Prepare an outdoor grill for medium-high cooking over direct heat.
    3. 3. Remove the steak from the marinade (discard the marinade) and grill, turning halfway through cooking, for a total of about 10 minutes, until the meat feels only slightly resilient when pressed with a fingertip for medium-rare. Transfer the steak to a cutting board and let stand for 5 to 10 minutes.
    4. 4. Meanwhile, prepare the tacos: In a large bowl, toss the cabbage, carrots, scallions, and cilantro together.
    5. 5. Heat the tortillas on the grill, turning occasionally, for about 1 minute, or until hot. Transfer to a serving bowl and cover to keep warm.
    6. 6. To serve: Cut the steak across the grain into 1/4-inch-thick slices. Transfer the steak slices and any carving juices to a platter. Serve the steak with the reserved marinade, tortillas, cabbage mixture, and guacamole. Let each guest fill two tortillas with some steak and cabbage mixture and top with some of the marinade and guacamole.

Now lets move off the land and into the sea. Fish tacos are delicious and often light and refreshing. They can be as healthy as you make them…and if you bread and fry the fish as savory as you wish. This recipe will lack that fried crunch that some many fish tacos lovers prefer, but Alton Brown as served up the amazing marinade to add all the flavor you could want. As I have mentions, there is nothing like a crunchy slaw with a well season taco and this fulfills that desire as well!.

Alton Brown’s Fish Tacos


This could be YOUR dinner!

FISH TACO
  1. 3 cloves garlic
  2. 1 cup packed cilantro leaves
  3. Zest from 2 limes
  4. 2 teaspoons ground cumin
  5. 1 1/2 teaspoons kosher salt
  6. 1 teaspoon freshly ground black pepper
  7. 1/4 cup tequila
  8. 1 pound tilapia fillets
  9. 1 tablespoon olive oil
  10. 8 (7-inch) round flour tortillas, recipe below
  11. Crema, recipe below
  12. Shredded red cabbage
  13. Lime wedges
FLOUR TORTILLAS
  1. 9 ounces all-purpose flour, plus 1/4 cup for kneading and rolling
  2. 1 teaspoon kosher salt
  3. 1/3 cup lard
  4. 1/2 cup cool water
CREMA
  1. 1 cup heavy cream
  2. 1 tablespoon buttermilk
  3. 1 chipotle chile in adobo sauce
  4. 1/4 teaspoon kosher salt
Instructions
  1. Pulse the garlic, cilantro, lime zest, cumin, salt and pepper in a small food processor for 20 seconds. Then, with the processor running, add the tequila.
  2. Place the tilapia fillets into a 1 gallon zip-top bag, add the paste and move around to coat each fillet. Work as much air out of the bag as possible, seal and aside at room temperature for 20 minutes.
  3. Heat an electric non-stick griddle to 375 degrees F. (I really like the griddle for this but in a pinch you can do this in a cast iron pan parked over medium heat for 10 minutes.)
  4. Brush the griddle with the olive oil and cook the fillets 3 minutes per side or until just cooked through and opaque. Cut into strips and serve in warm tortillas with crema, shredded red cabbage and lime juice.
FLOUR TORTILLAS
  1. Combine 9 ounces flour and salt in the bowl of a food processor, pulsing 2 to 3 times.
  2. Add the lard in 4 to 5 chunks and pulse 10 times or until the mixture resembles coarse crumbs. With the processor running, add the water in a steady stream until a ball of dough begins to form, approximately 30 seconds.
  3. Sprinkle remaining 1/4 cup of flour on a clean surface. Remove the dough from the bowl of the processor and knead for 2 to 3 minutes or until most of the flour has absorbed and the dough is less sticky.
  4. Wrap dough ball in plastic wrap and rest at room temperature for 1 hour.
  5. Evenly divide the dough into 8 pieces and form into round balls. Roll each ball into 7-inch rounds with a rolling pin on a lightly floured surface. Keep all dough balls covered with a tea towel.
  6. Heat an electric non-stick griddle to 375 degrees F.
  7. Place the tortillas, 2 to 3 at a time, onto the griddle and cook for 4 minutes per side or until light golden. Hold for up to 2 hours at room temperature wrapped in a barely damp tea towel. Repeat with the remaining tortillas. Microwave for 1 minute in the damp tea towel to reheat.
CREMA
  1. Place heavy cream in a microwave-safe 16 ounce glass jar and microwave on high 30 to 40 seconds or until cream is just under 100 degrees F. Add the buttermilk, close jar and store in a warm place for 24 hours. The cream will have thickened to the consistency of thin yogurt.
  2. Add the chipotle chile and salt and process with an immersion blender, in the jar, until smooth, approximately 20 seconds. Refrigerate until ready to use.

Moving right along – let’s go meatless! These Veggie Tacos from SoupAddict.com are packed with great veggies and just as importantly, flavor! Since gaucamole is an addiction of mine it is clearly one of the key points of the recipe. Make this- you won’t regret it.

Loaded Guacamole Vegetarian Tacos

Loaded Guacamole Vegetarian Tacos from SoupAddict.com

LOADED GUACAMOLE VEGETARIAN TACOS
PREP TIME
20 mins
COOK TIME
8 mins
TOTAL TIME
28 mins
Author: SoupAddict
Serves: 6 tacos
INGREDIENTS
for the guacamole
  • 2 avocados, pit and skin removed, roughly chopped
  • 1/2 of a lime
  • 1/2 of a lemon
  • 1/4 salt (plus extra as needed)
  • 1/3 cup corn kernels (raw, from about 1/2 of a large cob, or thawed from frozen)
  • 1/4 cup red bell pepper, diced
  • 2 tablespoons diced poblano pepper
  • 1 tablespoon diced red onion
  • 1 tablespoon diced jalapeño pepper
  • 2 teaspoons minced cilantro
  • 1 clove garlic, minced
for the black beans
  • 1 can black beans (15 ounces)
  • 1/3 cup corn kerns (raw, from 1/2 of a large cob, or thawed from frozen)
  • 1/4 cup red bell pepper, diced
  • 1/4 cup poblano peppers, diced
  • 1/2 teaspoon ground cumin
for the tacos
  • 6 small flour or soft corn tortillas
  • 2 cups chopped iceberg or romaine lettuce
  • 1 tablespoon minced cilantro
  • hot sauce, such as Cholula or Sriracha (optional)
  • lime and/or lemon wedges
INSTRUCTIONS
prepare the guacamole
  1. Mash the avocado in a medium bowl with a fork (or molcajete) until it reaches your desired consistency, chunky or smooth. Add a small squeeze each of lime and lemon juice, along with 1/4 teaspoon salt. Mix well and taste. Add more lime juice, lemon juice, and salt as you like. Stir in the remaining guacamole ingredients. (To make ahead, cover the bowl with plastic wrap and press gently against the guacamole. The entire surface of the guac should be touching and covered by the wrap, to keep air out. Then, cover the bowl with a second sheet of wrap, and refrigerate.)
prepare the black beans
  1. Add all of the black bean ingredients to a 2 quart sauce pot and heat over medium-low until hot. Turn off the heat and allow to cool to a very warm, eatable temp (a few minutes should do it).
assemble
  1. If the tortillas are not soft and pliable (or if you like your tortillas warm), stack them on a microwaveable plate, separated with paper towels, and heat for 20 to 30 seconds.
  2. Line half of each tortilla with lettuce. Spoon the black bean mixture over the lettuce (on half of the tortilla). Spoon guacamole on the other half. Top with a few shakes of hot sauce (optional) and a sprinkle of cilantro. Serve with lemon and lime wedges.

MAKE SURE YOU LET ME KNOW WHICH OF THESE ARE MOST INTERESTING. I look forward to hearing from you.

CHICKEN TACOS & Tostadas- So Many Possibilities


Chicken tacos are one of my favorite things to make for dinner, even when entertaining. They are versatile, can be indulging or healthy, and spicy or sweet. There are so many options and with so many ingredients to choose from there are flavors for everyone. I’ve been sampling recipes from cookbooks, blogs, websites and magazines for about a year now and I’m ready to share some of my favorites with you! Let me know which one you would like to try in the comments!

Lets’ start with that delicious one pictured above that I found on Half Baked Harvest- Made With Love; One of my favorite blogs and this recipe is everything. Here is the link so you can check out her tips and see the fantastic photos of these tacos in the making. http://www.halfbakedharvest.com/bbq-margarita-chicken-tostadas-sweet-jalapeno-margarita-salsa/

The recipe is here but clink the link to read her lovely post:

BBQ Margarita Chicken Tostadas with Sweet Jalapeno Margarita Salsa

Ingredients

  • BBQ Margarita Chicken
  • 1 pound boneless skinless chicken breast
  • 1 tablespoon olive oil
  • 1 cup of your favorite BBQ Sauce
  • 2 tablespoons tequila (optional)
  • 2 teaspoons lime zest
  • 2 teaspoons orange zest
  • 1 lime, juiced
  • 1 clove garlic, minced or grated
  • 1 jalapeño, seeded + finely chopped
  • 1 teaspoon cumin
  • 1/2 teaspoon salt + pepper
  • Sweet Jalapeno Margarita Salsa
  • 1 (14.5 ounce) can fire roasted diced tomatoes, drained
  • 3/4 cup mango, finely diced (pineapple, peaches, nectarines or really any other fruit would also work)
  • 2 jalapeños, seeded + finely chopped (use 1 for less heat)
  • 2 green onions, chopped
  • 1/2 cup fresh cilantro, chopped
  • 1 teaspoon lime zest
  • 1 teaspoon orange zest
  • 1 lime, juiced
  • 2 tablespoons tequila (optional)
  • good pinch of salt
  • For serving
  • 4-8 corn tortillas
  • canola oil
  • 1 batch Mexican Fries
  • 1 avocado, mashed with a pinch of salt, pepper and chopped cilantro + lime juice
  • 1/4 cup fresh cilantro
  • greek yogurt or sour cream
  • queso fresco or cotija cheese, crumbed

Instructions

Heat a skillet over medium heat. Add canola oil, about 1/4 teaspoon at a time, add one tortilla and cook for about 30-60 seconds per side, until just golden and bubbly. Remove and let drain on a paper towel. Set aside until ready to use.

Preheat your grill to medium high heat.

In a medium bowl mix together the BBQ Sauce, tequila, lime zest, orange zest, lime juice, garlic, jalapeño, cumin, salt and pepper.

In another medium size bowl combine the chicken, olive oil and 1/4 cup of the BBQ Margarita sauce. Toss well. When the grill is hot, grill the chicken for 6 to 7 minutes per side or until cooked through. Remove from the grill and allow to rest five minutes. After five minutes shred the chicken and toss with 1/2 cup of the BBQ Sauce. Keep warm.

While the chicken is grilling toss together the salsa. In a medium bowl combine the diced tomatoes, diced mango, jalapeños, green onions, cilantro. lime zest, orange zest, lime juice, tequila and salt. If desired you can add the salsa to a blender and pulse until your desired consistency is reached. I leave mine chunky.

To serve, grab a crispy corn tortilla and spread the avocado over the bottom. Now add the shredded chicken. Drizzle with a little BBQ sauce and top with Mexican Fries, greek yogurt, salsa, cheese and cilantro…fiesta time!

There of ingredients in this recipe, which usually turns me off BUT this is a great recipes for a small gathering or an outside family dinner. hat sweet and spicy salsa, those crunchy tostadas! LOVED THESE. Oh, and see that little BLUE link in the last line about Mexican Fries? Click that link! You won’t regret it!

The next gem of a taco comes from The Pioneer Woman. Everyone knows I love her so why not throw one of her family’s recipes in the mix! Once again, awesome photography makes clicking the link worth it! http://thepioneerwoman.com/cooking/my-brothers-chicken-tacos/ Recipe below:

My Brother’s Chicken Tacos

8 Servings

INGREDIENTS

  • 16 whole Corn Tortillas (small Size)
  • 4 whole Boneless, Skinless Chicken Breasts, Cut Into Pieces
  • Salt, Cumin, Chili Powder To Taste (or Use Taco Seasoning)
  • 2 Tablespoons Canola Oil
  • 2 cans (4 Ounce) Diced Green Chilies
  • 1-1/2 cup Finely Grated Cheese (cheddar Or Cheddar/jack Mix)
  • Sour Cream
  • Hot Sauce (Chulula Or Other Brand)
  • 2 cups Thinly Sliced Romaine Lettuce (or Any Lettuce)
  • 4 whole Roma Tomatoes, Diced
  • Canola Oil, For Frying Tacos

INSTRUCTIONS

*Be careful frying with hot oil!*

Season diced chicken liberally. Heat 2 tablespoons oil in large skillet over medium-high heat. Add the chicken and cook for a couple of minutes. Dump in the diced green chilies. Stir and cook until chicken is totally done inside. Turn off heat and set aside.

Have all other ingredients—grated cheese, sliced lettuce, diced tomato, sour cream, and hot sauce—ready.

Also have a plate ready, as well as a stack of five or six paper towels to hold in your hand.

TO FRY

To fry the tacos, heat a couple of inches of canola oil in a heavy skillet over medium-high. Place some chicken in the middle of a tortilla, then fold tortilla in half. Clamp the tortilla shut with a pair of heat-proof metal tongs, then carefully lay the taco—one side down—in the oil. As you lay it in the oil, use the tongs to hold the top side down for a few seconds to form it in place. Once it stays put, repeat with two other tacos. Turn tacos after 30 to 45 seconds, or when each side gets light golden brown (not too brown.)

One at a time, remove tacos from the pan with tongs, holding sideways as you remove them to allow oil to drip out of the sides. Place the taco in the stack of paper towels. Fold the sides and corners around the taco to tightly hold it, then give it three or four shakes to remove excess oil. Remove it from the paper towels and place on a plate. Repeat with other tacos in the pan.

As you continue frying the other tacos, have someone carefully place some grated cheese inside the tops of the tacos (gently pry them open just enough to place the cheese in). Then just let them sit until ready to serve—the cheese will melt as it sits in the warm taco.

To serve, garnish in this order: a smear of sour cream, dashes of hot sauce, shredded lettuce, diced tomato. You’ll need to slightly open up the tops of the tacos to get all the garnishes in there.

Tacos will be hot for a minute or two after frying, so don’t rush into eating! They’ll stay nice and warm for a little while after frying.

 These are a easy classic,  use a can ingredient which I always appreciate and are served with a crunchy shell you crisp up yourself. LOVE. Top with some sour cream! YUM.
NEXT- Lets leave the Southwestern US for a bit and travel to the far east….at least with our taste buds. This recipe makes a tasty Asian Chicken Taco. I was inspired by chain restaurant Applebees’ chicken wanton tacos to find a yummy Asian taco and BAM. Here is the best on I’ve tried. This comes from Sam the Cooking Guy at TheCookingGuy.com. Here’s the link: http://www.thecookingguy.com/cookbook/asian-chicken-taco-healthy-recipe
These are healthy and scrumptious. The recipe makes 4-6 tacos…that means 4 to me! The ingredients are easy to find at your local grocery store. The ginger and chili paste give it the perfect warmth and the cool slaw evens everything out. Look how pretty:
So, are you going classic, elaborate or oriental? My fav is the Asian Chicken Taco so far…more to come

More Farmer’s Market Meals ….

Here are three more fabulous meals based around Farmer’s Market finds! I’m a fajita lover so the first is my fav! What is yours?

From health.com Pepper Steak Fajitas

Ingredients

  • 3 cloves garlic, minced
  • 3 tablespoons fresh lime juice
  • 1/2 teaspoon chili powder
  • 1 1/2 pounds skirt steak, cut crosswise to fit in skillet (about 3 pieces)
  • 2 tablespoons olive oil
  • 3 large bell peppers, any color, seeded and sliced
  • 1 teaspoon cumin seeds
  • 12 6-inch whole-wheat tortillas
  • Sour cream, avocado, cilantro and lime wedges, optional

1. In a shallow glass dish, stir together garlic, lime juice and chili powder. Add steak, turn to coat and let stand for 5 minutes, turning occasionally.

2. In a large nonstick or seasoned cast-iron skillet, warm 1 Tbsp. oil over medium-high heat. Cook bell peppers, stirring occasionally, for 4 minutes. Add cumin seeds; continue to sauté until bell peppers are lightly browned and tender, about 2 minutes more. Transfer to a platter.

3. Add remaining 1 Tbsp. oil to skillet. Add steak and cook, turning once, until browned, about 6 minutes for medium-rare. Transfer to a cutting board and let stand for 5 minutes before slicing thinly against the grain.

4. Top tortillas with bell peppers and steak. Serve with additional toppings such as sour cream, avocado, cilantro and lime wedges, if desired.

I like to whip up guacamole for these fajitas. Find that recipe on my Father’s day post!

Do you like to grill?

If so, then this recipe is for you. It is from one of my favorite blogs- iowagirleats.com. This slaw is fresh and outstanding. Try it. Thank me…then her…later!

Asian Grilled Chicken with Snap Pea Slaw is a healthy, gluten-free grilling recipe full of crunch and flavor! | iowagirleats.com

Asian Grilled Chicken with Snap Pea Slaw

Here is another one from Iowa Girl Eats blogger, Kristen. It is light, refreshing and filling!

Summer Rolls with Peanut Dipping Sauce


Fresh Summer Rolls with Spicy Peanut Dipping Sauce are light, crunchy, and healthy, and paired with a craveable yet easy dipping sauce! | iowagirleats.com

Now I have never been a fan of peanut sauces so I use a ginger infused soy sauce for dipping. It is just a delicious, I promise!


A Father’s Day Menu

I love cooking delicious food for my husband for Father’s Day. We throw healthy out the window on this Sunday and chow done on some great food. Enjoy.

Breakfast. Breakfast is a big deal on Father’s Day. My husband is only every home for the entire day on major holidays and Sundays. This major holiday is HIS day and I like to spoil him. We aren’t big on buying gifts on special days. We take good care of each other on a regular daily basis. SO, cooking special foods is something I can do just with him in mind. He hardly ever eats a real breakfast because he leaves so early for work. So Father’s day is important when it comes to breakfast.

This year I am making him these gooey egg sandwiches. They’ve got a Tex-Mex flair and just enough thick bacon to make then (almost) decadent. We are avocado fans so this hits that button too! I have included a salsa and guacamole recipe. Obviously, there is a bit of prep work involved, but hey, Don’t these Daddy’s deserve a little fuss?

For each sandwich you will need:

Ingredients

  • 1 egg
  • salt and pepper to taste
  • 1 English muffin , lightly toasted and LIGHTLY buttered
  • 2 tablespoons refried beans (heated)
  • 2 tablespoons guacamole- use your favorite or my recipe below
  • 1 tablespoon salsa- recipe below
  • 2 thick slices of cooked bacon OR pork roll

Directions

  1. Fry the egg as desired, season with salt and pepper to taste, spread the refried beans on one side of the English muffin and the guacamole on the other, place the egg on one side and top with the salsa and the other half of the muffin.
Salsa recipe:

Ingredients

  • 1 pound plum tomatoes
  • 2 serrano or jalapeno chilies
  • 1 small onion, peeled quartered
  • 2 cloves garlic, peeled
  • 2 tablespoons cilantro
  • salt to taste

Directions

  1. Roast the tomatoes, chilies and garlic in a cast iron pan over medium-high heat or under the broiler until slightly charred on all sides removing them as they are done, about 20 minutes for the tomatoes and less for the chilies and garlic before removing the stems from the chilies.
  2. Puree everything in a food processor until you get the desired consistency
  3. Season with salt to taste and serve warm.

Guacamole recipe:

INGREDIENTS

  • 3 large Hass Avocados (black in color,slightly soft to the press)
  • 1 large lime, juiced
  • 1/2 medium white onion (diced)
  • 1/4 cup loosely packed fresh cilantro, chopped finely (optional)
  • 1 large Roma tomato(Diced-make sure it isn’t overly ripe)
  • salt and pepper to taste
  • finely chopped fresh jalapeno (optional) OR 1/2 tsp cayenne pepper

DIRECTIONS

  1. Slice avocados in half. Discard the seed. Scoop out of shell with a spoon. Place in bowl.
  2. Add juice of one fresh lime immediately to prevent browning. Use a fork and mash to desired consistency.
  3. Add chopped onions, tomato, and cilantro. Stir gently to mix ingredients.
  4. Add juice of second lime and then salt/pepper to taste. Stir just slightly, until incorporated.
  5. Add jalapeño or cayenne pepper to taste.

We do not serve a typical lunch on Father’s Day. The kids and Daddy are usually busy playing, going for a walk or taking a trip to the park so I like to set out easy to reheat finger foods whenever they are back in the house around lunch time. There are a few choices and everyone finds something they love. This year it will be Sausage-Cheddar Balls, Deviled Egg, Stuffed Mushrooms and Sweet Tea!

Here are links to the perfect Martha Stewart recipes I am using this weekend:

Martha Stewart’s Deviled Eggs

Creamy Deviled Eggs Looking to change it up? Chop some bacon or thick cut ham and add it on top. My kids LOVE that.

Sausage Cheddar Balls

Sausage-Cheddar Balls

Stuffed Mushrooms

Stuffed Mushrooms I like to top with a little melted garlic butter too.

Sweet Tea is simple –  Boil 8 cups of water and add to glass pitcher with 6 Lipton tea bag and 1 1/2 cups of sugar. Stir until all the sugar is dissolved and you tea is a dark color. Add 7 cups of cold water and 1 tray of ice cubes. That’s all! Add sliced lemons if desired.

DINNER TIME!

I call on the pioneer woman for this recipe. My husband LOVES meatloaf. It is a heavy dish and not one a cook often but when I do make it, I go all out. The glaze on the is to die for and because I refuse to have a meal that doesn’t included bacon on Father’s day, this recipe is perfect! I have made this meatloaf recipe about 6 times and it has always been a hit – even with my father. SO make it just this once and see what you think!

Pioneer Woman’s Meatloaf

DSC_0156_9184

DESSERT

Ok. After a menu like this, no one needs dessert. But it’s a special day, right? Well I promise to take it easy. I end the day with a bright colorful light fruit salad with a sweet glaze. It is a fantastic way to end such a heavy day of eating. The link below is pretty close to the one I make EXCEPT that we switch out the kiwi with raspberries and we add some fully ripened cantaloupe. To make up for that pop of green we use half red and half green grapes. Just a family flavor preference.

Fruit Salad


Perfect Summer Fruit Salad

There you have it! Our Father’s Day menu! I hope you see something you can incorporate this year!!! Leave me a comment with your favorite Father’s Day meals!!!

Design a site like this with WordPress.com
Get started